Supply list:
1-2 alligator clips (mine are 1 3/4" long)
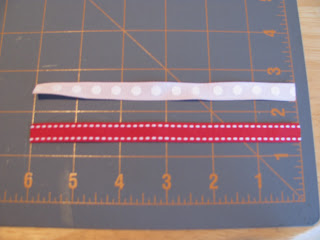
2 contrasting ribbons (grosgrain - not smooth - works best to grip fine baby hair)
glue gun
sewing machine with matching or contrasting thread
Decide which ribbon will be your main color and which is your contrasting color. I decided on red as my main color. My contrasting ribbon is actually soft pink, but appears white in these pics. Cut your main ribbon to cover each alligator clip. To measure, insert the ribbon in the clip (as shown below), then wrap it around the back and cut. Mine ribbon pieces were about 4 1/2" long, but do not cover the bottom of the clip (see later pics and explanation). Heat seal the edges and set aside.
Cut 2 pieces of each ribbon in 6" lengths. Heat seal the edges.
Layer 1 main and 1 contrast ribbon with wrong sides together. Fold them together at a right angle near the middle.
Fold one side back again, keeping the right angle. Pin to secure. This is a bit tricky to explain. (I had to try a couple of times to get it right and to get my ends even.) You want each side to end up the same length.
Here's where the sewing machine gets involved. Sew a small square over the section you have just folded. Be sure to back stitch as you begin and end to secure your stitches. (If you're new to sewing, there are lots of beginning sewing tips online.)
Pin the loose ends together at a right angle, keeping both ribbons layered. Sew another little square to secure the ends. At this point, your ribbons look kind of like a teardrop - it is NOT supposed to lay flat.
Now it's time for the glue gun. Here are 4 easy steps to cover a clip with ribbon (top to bottom in pic). Glue each part as you go.
1. Glue about 1" of ribbon and place in the clip. Watch out, since the glue comes through the slit in the clip!
2. Wrap the ribbon back over itself, enclosing the upper section of the clip.
3. Tuck the ribbon into the "pinchy" part of the clip. (Do you know a better word to use beside "pinchy"?)
4. Wrap the rest around to the bottom of clip.
Side note: I have found that leaving the bottom of the clip with no ribbon works best with my daughter's hairstyles. I usually put it in a "sprout" with a rubber band, then put the clippie just under the rubber band. The metal point slides right through her hair. If you are putting a clippie straight into a section of hair with no rubber band, you may want to wrap your ribbon all the way around the bottom of the clip and back into the middle clip area. This would take about 1" more ribbon length.
Now take your teardrop ribbon shapes and glue the bottom of one tear drop to the top end of your clip, main ribbon down. Bring the other end over and glue just below the first part. Ta-da - it makes a heart shape! Repeat if you're making two clippies.
There you are: two adorable clippies for your sweet little valentine.
Here's my valentine, showing off her clippie while eating her favorite: goldfish! That's one way to get her to be still for a picture - strap her into the high chair and bribe her with snacks! I'm not above bribery.
Hopefully, I've given pretty clear instructions. If you have any questions, please leave a comment. Thanks for checking out my first tutorial.
Next up: I just started working on another Mama Stellato pattern dress for Annelise.
Happy crafting,
Julie
I'm linking up with the following link parties. Check them out!


Those are so cute! Love the idea.
ReplyDeleteSo,so cute - thanks for sharing!
ReplyDeleteVisiting from Tatertots and Jello.
So Cute! Would love for you to add to my Thursday Treasure Party @
ReplyDeletewww.thetreasurista.blogspot.com
Thanks,
The Treasurista
Finding and Creating FUN things...
Adorable!
ReplyDeletethanks for a great, easy to follow tutorial.
ReplyDeleteThese are so great!! Thanks for sharing these.
ReplyDelete