So I haven't posted since July 12 - yikes!!! I haven't even crafted since then. But I promise there's a really good reason. I'll let Annelise tell you all about it...
See, I told you it was a really good reason!
I found out I was expecting our 2nd child on June 7, the day before our 15th wedding anniversary. Since my husband and I found out together about Annelise, I wanted to surprise him with the news about baby #2. So on the morning of June 8, after Eric went to work, I whisked Annelise off to Walmart for some supplies.
We got a Garanimals T-shirt for $3 and a fat quarter of black/white dot fabric for about $1.99. I already had fusible web and buttons at home, so I basically spent $5. (I like the Lite Steam a Seam, especially for sewing through. It's not too stiff when you apply it.You can get it anywhere that sells fabric. It's about $4 for 5 sheets, and I used about half a sheet for this project.) Want to make your own personalized message shirt? I promise it's pretty easy.
I started out measuring how big I wanted the message to be on the shirt. I used WordArt in Microsoft Word and typed in the chosen text. Next, I right clicked on the WordArt, chose Format WordArt, then on the Size tab, set the height & width for the shirt I measured. The font I used is called Soup of Justice, and I got it free from dafont.com (love that site for free fonts!). I like that it's bold and chunky, and not too swirly, so it's easy to cut out and stitch around.
Next, cut out each letter (you don't need to cut out duplicates at this stage, just remember to cut how many you need from the fabric.
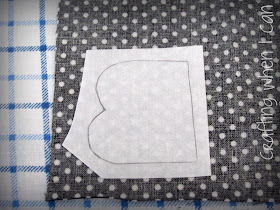
Trace your letters in reverse on the sticky side liner paper of the fusible web.
Cut loosely around each letter - not right on the line!
Remove the non-sticky liner and apply the sticky web to the wrong side of your fabric. The web will stick temporarily, then when you iron it down, it will be permanent.
Finally, cut out all your fabric letters and arrange on the shirt. When you're happy with the placement, peel off the backing, set them in place, and iron those puppies down. You can stop here and the letters will be permanently affixed. I stitched around each letter with coordinating thread. If you're not comfortable with sewing, you could also use fabric paint to trace the edges, or just leave them as they are.
You'll notice I did not cut out the tiny middle parts of the "B's". Yeah, I'm lazy, not crazy. I just hand-sewed two buttons to each "B", which I think turned out cuter anyway. This whole project took about 1 1/2 hours.
So if you're still reading, you might be wondering how the surprise worked out. Since our anniversary was a Wednesday, we were at church for most of the evening. When we got home, I told Eric I wanted him to see Annelise's new shirt. I took her into the other room, put the shirt on and sent her out. At first, he got it, but he didn't GET it. Eric said, "Annelise, are you going to be a big sister some day?" I had to let him know that it wasn't just one day, it was now. After he finally realized I was serious, he got really excited.
Here's Annelise and the happy daddy-to-be-again! (Well, half of his face - haha!)
We emailed this picture to some family members to let them know, and we skyped with my parents and put Annelise (in the shirt) up in front of the camera.
For my first trimester, I was exhausted and napped every afternoon when Annelise napped. And since nap time is usually craft time, none of that has been happening lately. At 15 weeks, I'm finally beginning to have a little more energy during the day. Which is good, because I have a stack of fabric waiting to be turned into fall clothes for a cute "big sis 2 be"!!!
Happy crafting,
Julie


